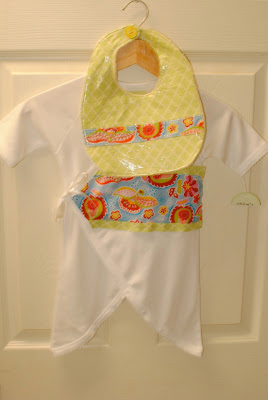
Supplies needed:
bib pattern
fabric
terry cloth (optional)
clear iron on vinyl (optional)
sewing supplies
velcro, buttons
Before we get started, let me apologize for the quality of the pictures. I have been practicing using my camera in manual mode. Guess I should save it for my tutorials when I get a little lot better. But you will get the idea!
First, you will need a pattern for your bib. These are very easy to make. Bibs are symmetrical, meaning they are the same on both sides. Fold a piece of paper in half and draw half of your bib and half of the hole for the neck. Keep the paper folded and cut along the drawn lines. When you open it up, you will have the perfect bib pattern. Now, if you don't know or think you can draw half of a bib, then you could trace one that you already own. Chances are, if you are reading this, you have a bib laying around the house.
Next, let me introduce you to my new favorite addiction supply.
This is clear iron on vinyl that you can purchase from a fabric store. I got mine at Hobby Lobby for 25% off $7.99. Did you know that if you forget to print out the weekly coupon, you can just pull it up on your phone and show the cashier?! So what this does is laminates the fabric or puts a clear coating over it and makes it shiny, like oil cloth. Perfect for a bib. Just follow the directions on the package. Its very easy!
Once you have your fabric ready, place the bib pattern on top and pin in place.
Cut out the fabric around the pattern. Take out the pins. If you would like to add a coordinating piece of fabric to your bib, then now would be the time to do that. Just cut a strip of fabric (that you would have already had laminated) and sew it on to the bib.
Place the right side of the fabric to the right side of the terry cloth and pin in place. I like to use terry cloth for bibs because it can be used to easily wipe up messes after the meal is finished.
Only trim off the majority of the extra terry cloth, not totally cutting out around the bib. This is because the laminated fabric tends to slip while sewing and the terry cloth will stretch so you can easily pull out any wrinkles. Also, leave an opening about 3.5 inches so you can pull the right sides of the bib through. I like to leave my opening at the bottom edge. Now its time to start sewing around the bib. Go slow, especially around the neckline. Trim off extra terry cloth and unpin your fabric. Now turn the bib right side out using the hole you left open. The laminated fabric will be a little wrinkled. All you have to do is use the protective paper that came with the vinyl and iron it out some. After you have the bib all ironed out and smooth, sew back around the edge of the bib, closing up your opening and giving it a more finished look.
For the closure of the bib you can use snaps, velcro, etc. I sewed a piece of velcro and then added a button to hide my stitches.
And you are done! These make great baby gifts!
I think they go great with this little outfit and can't wait to meet the wee one that is going to wear it!


ha ha i made the bib a couple days ago :) too funny
ReplyDelete